Ensure that the “Integration” section is properly configured in your Personio instance before proceeding with the Power BI App installation:
- Log in as an Administrator to your Personio instance and navigate to Settings > Integrations > API credentials.

- On the API credentials page, click Create custom integration, then enter a name for the integration (e.g., Power BI Integration) and click Next.

- Under Configure access rights, select the following modules:
- Employees
- Attendance
- Time off
Then, in the Readable employee attributes section, select the following attributes, and click Create integration:- Last name (legal)
- First name (legal)
- Gender
- Absence entitlement
- Contract ends
- Department
- Fixed salary
- Hire dtae
- Workplace
- Position
- Team
- Weekly hours
- Name (preferred)
- Birth datew
- Public holidays

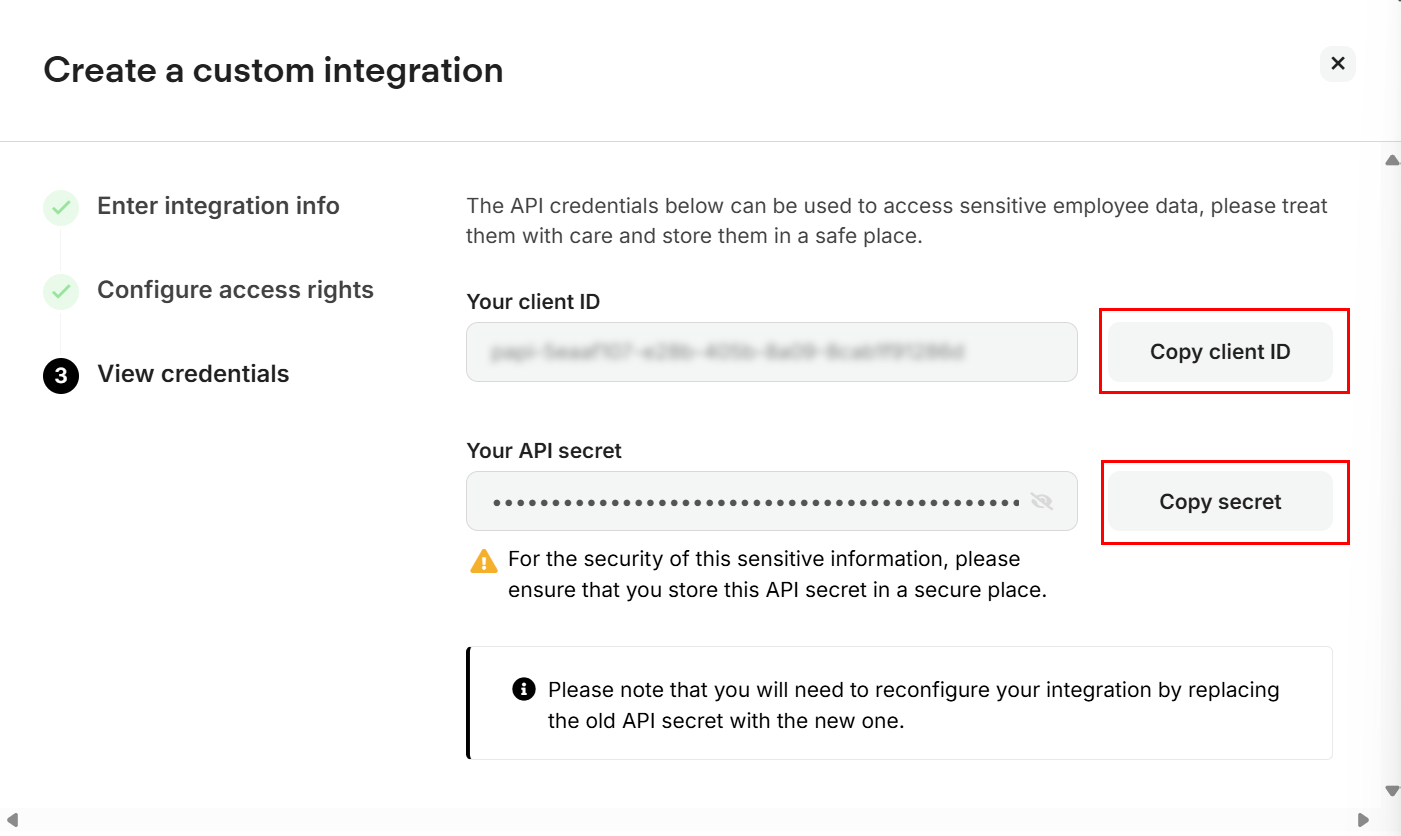
- On the View credentials page, copy the Client ID and API Secret. You’ll need these to connect Personio with Power BI.
Follow the steps below to configure the Power BI App using the credentials obtained from Personio:
- Click the following link to install the Power BI App from Microsoft AppSource: Power BI for Personio and click Get it now.

- Confirm the installation by clicking Install.

- Click the “…” (More options) menu next to the Power BI App name and select Settings.

- In the App Workspace, locate the Semantic model and open its Settings.
If the Settings page opens directly after clicking the app, you can skip this step and proceed to Step 5. - On the Settings page, go to the Semantic models section and click Data source credentials.
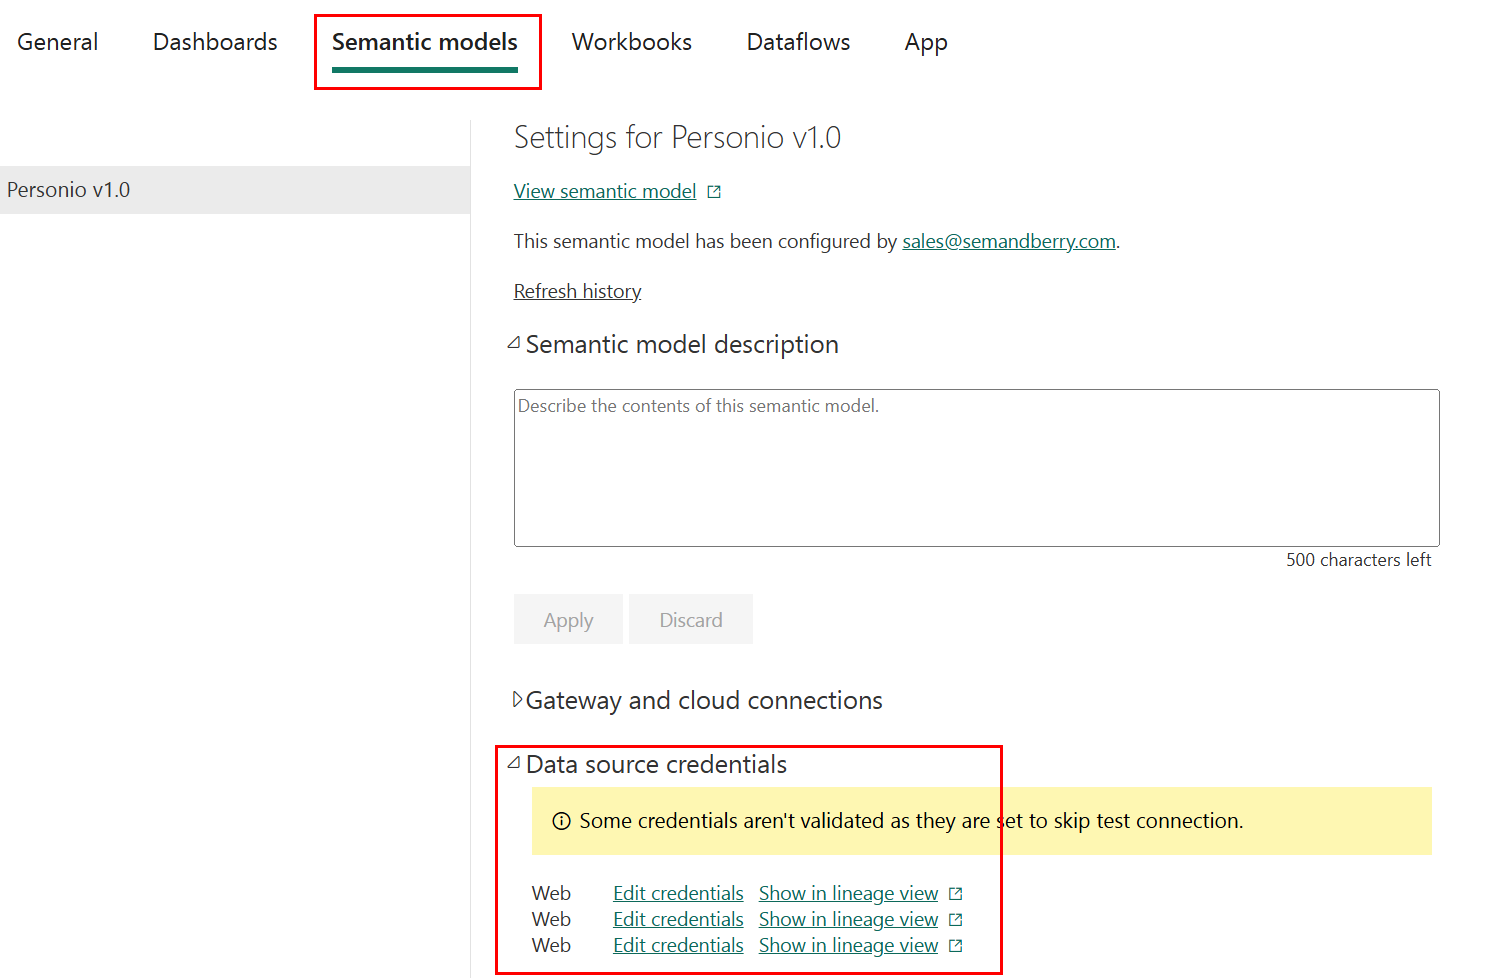
- In the Data source credentials area, click Edit credentials for each listed connection.
In the dialog box, make sure “Skip test connection” is selected, then click Sign in.
- On the same Settings page, open the Parameters section and enter the following values:
- ClientId – Personio ClientId
- ClientSecret – Personio Client secret
- StartDate – Start date for importing of Absence & Attendene (e.g. 2023-01-01)
- EndDate – End date for importing of Absence & Attendene (e.g. 2025-12-31)
- Language – Enter EN or DE based on your prefered language
- LicenceKey – Enter here your licence key.
- If left empty, the app will operate in Demo mode (limited to a maximum of 20 employees).
- Click here to get your licence key or click here to request your trial key.

- On the same Settings page, open the Refresh section and configure how often the data should be refreshed and click Apply.

- Your Power BI for Personio instance is now successfully installed and configured.
To trigger the initial data refresh:- Go to the Apps area and click Settings next to the Power BI app.
- In the App Workspace, click the Refresh icon next to the Semantic model.

- After the data is successfully loaded (see screenshots below for reference), you can open the Power BI App to view your Personio data in the dashboards and reports.

